Somewhere IamMeter invited people to share their use of IamMeter and had some prizes to hand out. This is my story over the month of June 2022.
We were on a mission to increase self consumption of our solar energy and are really happy we partnered with IamMeter to achieve this. Their environment just gets better and better.
The first step was to install a Paladin hot water solar diverter.
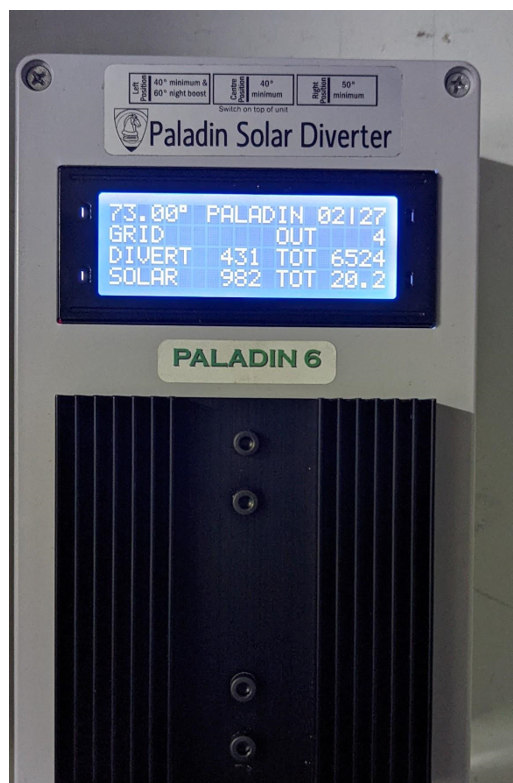
This device is based on the energy bucket concept pioneered by Robin Emley in the UK. Energy is diverted to the hot water system when the bucket fills before anything is exported to the grid. Solar export only happens when the hot water system is to temperature. Additional energy is stored by replacing the standard 70 deg C thermostat with an 80 degree one and fitting a temperature probe to the Hot water system. Paladin then has full control over the hot water temperature and heats it to a maximum of 73 degrees and results in much more precise temperature control. On poor solar days, the water temperature will be topped up by grid energy if the temperature falls below 40 deg C.
The hot water system is located about 6 m away from the Paladin so the sensor wires were extended using Cat 5 network cable.
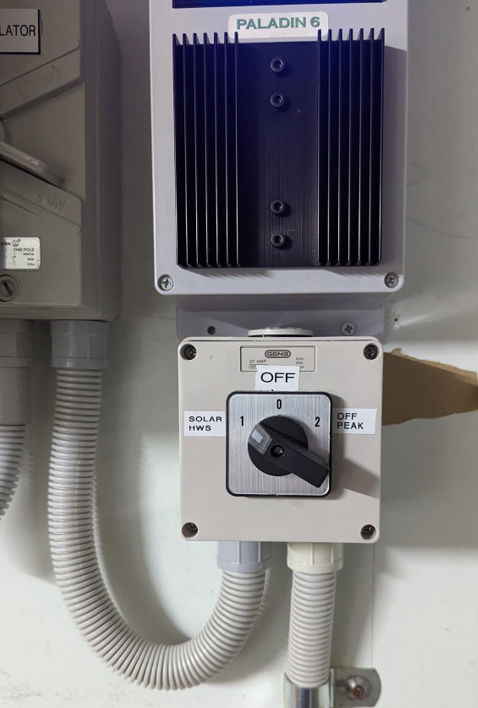
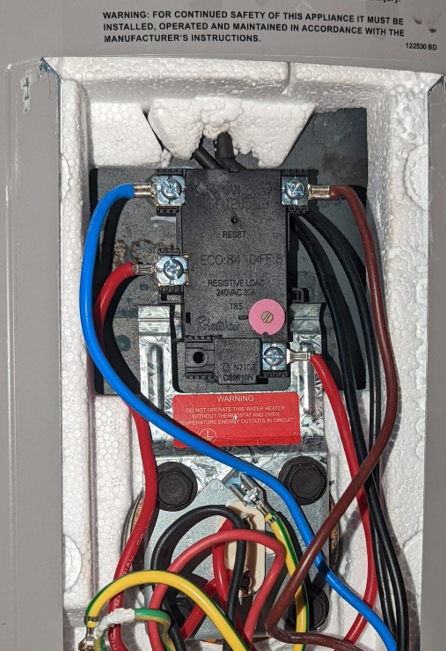
The mains wiring was rearranged to move the hot water system from controlled load (off peak) to our general tariff where solar energy is available. A bypass switch was used so we could return to off peak if it was ever required.
The hot water system consumes about 6.5 kWh of self-generated energy each day and has eliminated our controlled load (off peak) consumption.
About this time, we realised that our solar system had developed an earth fault and had not been generating energy for about 10 days before we noticed. We ended up replacing one string of panels (3.5 kW).
It became apparent that an energy meter would allow us to monitor the diversion, keep an eye on the condition of our panels and explore other methods to get more value from our self generated energy. We settled on the IaMmeter WEM3080T. It arrived very quickly because it was shipped from our country. We had no idea how much was out there in terms of smart energy management through home automation until we followed some of the links on the IamMeter web site.We couldn’t be happier with this meter.
Our meter box panel was full so we had to be creative.The IamMeter WEM3080T was installed in a separate enclosure in the garage. Using a right angle SMA connector allowed the enclosure lid to close. The Wifi antenna is mounted in the enclosure.
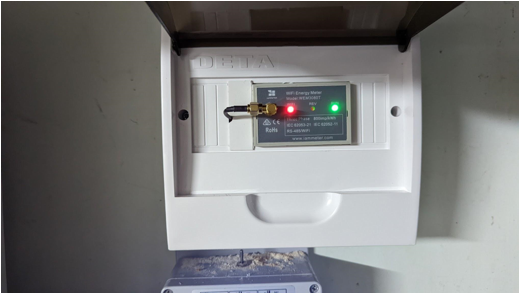
The 3 phase WEM3080T meter is perfect for our application as the three bidirectional sensors allow us to monitor Grid consumption/export, Solar generation and hot water diversion. There is a wireless access point on the other side of the garage (about 6 m away) so our connection to the IamMeter has been reliable.
We installed IamMeter’s Docker application on our Synology NAS and configured it to forward data to the Iammeter cloud. It also captures the meter data in a local SQL database on the Synology giving access to the raw data if required.
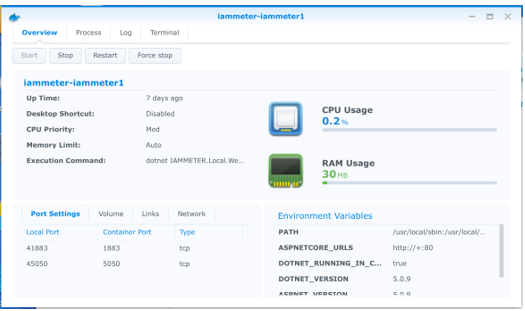
There are two things to watch with this. One was to ensure fixed port numbers are specified and your local time zone is set in an environment variable in the container. Failure to set fixed ports will mean the ports change on a reboot. Failure to set the environment will show your data in UTC time. Both of these can be set when you create a container on your Synology.
Our initial goal was to send the energy consumption data to PVoutput.org but we have since found that the insights afforded by the Iammeter cloud are so vastly superior, we have never bothered with PVoutput.org since even though the Iammeter Docker application is sending the data to it.
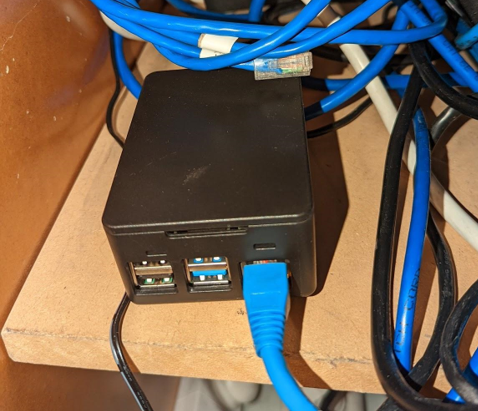
The next step we installed Home Assistant on a Raspberry Pi 4b which is powered by a PoE Hat. This makes it very easy to install in our server cupboard as the only wire attached to the Pi is the network cable.
Home Assistant currently retrieves the data from the Iammeter cloud but with recent changes to the IamMeter’s firmware, we will change this so HomeAssistant receives data direct from the meter via Modbus/TCP.
Its taken us a couple of weeks to get this working pretty smoothly and received outstanding support from IamMeter through their forum. None of these systems monitor solar energy diversion so we have set the diversion as a battery in IamMeter and Home Assistant. This is a feature that would be useful as if a battery is installed in the future this method will not work.
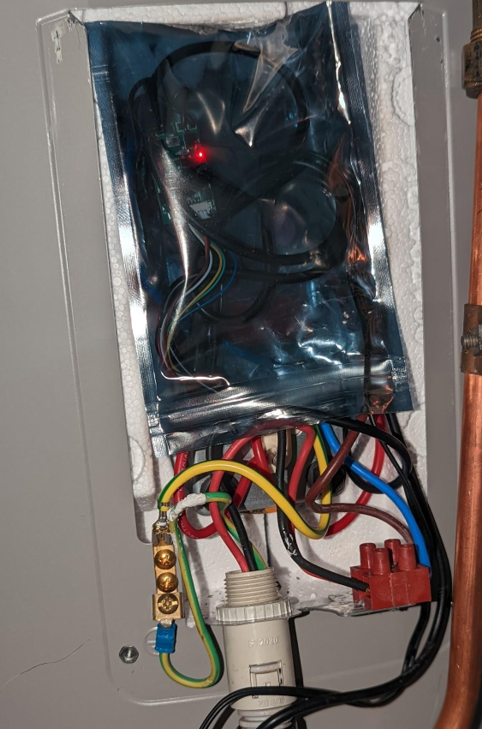
Today, we added an extra temperature probe behind the hot water tank insulation beside the Paladin one so we could see the water temperature in Home Assistant. (shown at the top above the thermostat.)
We attached the second probe to a Shelly Uni which we mounted inside a protective sleeve (that the temperature probe came in) so we could hide everything neatly under the Hot Water System cover.
The Shelly was simple to connect to Home
Assistant.
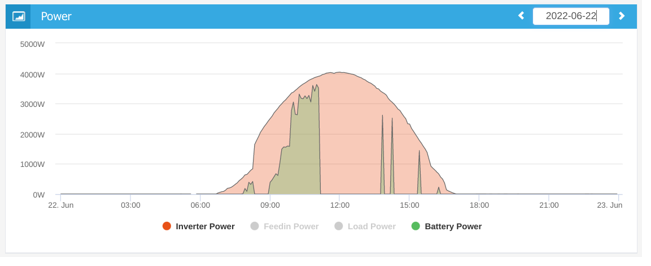
The graph below shows hot water consumption on a cloudless day. Note a couple of short top ups towards the end of the solar day
This is with the
house load overlaid to see the total load
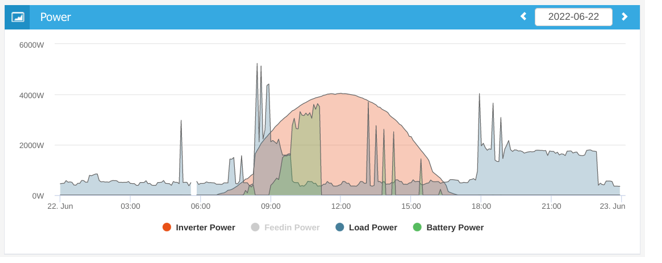
And finally, the imported grid energy. Almost no grid energy was consumed after the morning rush until the evening when we needed heating as it's the middle of winter where we live.

We
are now ready to maximise our solar energy savings by using IamMeter and Home
Assistant automations which include:
- Trigger a notification from the IamMeter if our solar system is not generating any energy to catch any system failures like we experienced with failed solar panels.
- Increase awareness of our energy consumption. The plan is to use a smart RGB downlight to show a colour coded energy status. Red for grid consumption, blue for solar diversion and green grid export. These statuses will be triggered direct from the IamMeter. By seeing these lights, we will be more aware of when to use appliances during the day.
- Use the IamMeter to trigger a Broadlink RM4 universal remote to turn on an airconditioner on the hot western side of the house when the IamMeter shows surplus solar energy is available during summer. We think this will have a significant impact on grid consumption by reducing the heat load during daylight hours in preparation for night time.
There are many more projects to conserve energy that we have planned that don’t directly involve our IamMeter. But if we had not purchased the IamMeter we would never have been introduced to the wonderful world of home automation using Home Assistant and wifi connected devices. Two proposed projects include:
- Use of smart relays and movement sensors to turn off lights that are often left on.
- Use of dimmable smart relays to run some lights at less than full power to conserve energy
In summary, the IamMeter cloud application provides deep insights into your energy usage. Regardless of how you are using your IamMeter, be sure to configure it to update the IamMeter cloud. Whilst Home Assistant's energy dashboard is good, the ability to drill into your data like you can in IamMeter is unparalleled.
The information from the IamMeter integration is really comprehensive but we chose a small subset to add to Home Assistant.
One addition I would like to see in IamMeter cloud is the ability to add a solar diversion device (or even multiple diversion devices) in addition to a battery.
I hope some of the simple things we have done inspire you to make better use of your IamMeter!

Hi rodweb
Thanks for your sharing.
We will read your sharing carefully next Monday.
Have a nice weekend.
BR
Jason
The last couple of days have been very overcast. Today, we only generated 4.2 kW of Solar for the whole day! This was well under our house load so no solar was diverted to the Hot Water. Under these conditions, the water temperature is "topped up" from the grid to 40 deg C. This has used 1.6 kWh of Grid energy during the day. So far, that is hot enough for showers. There are some settings to top it up further on the Paladin if required.
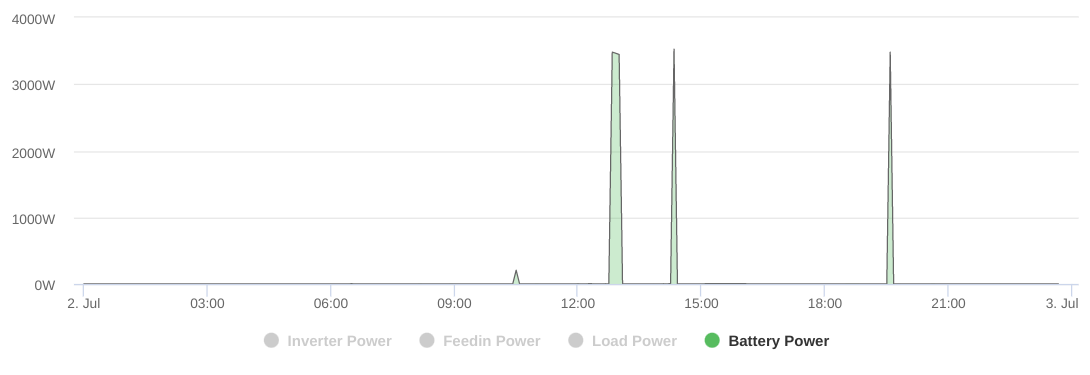
The water temperature also shows when these topups occur as the temperature rises when it happens..
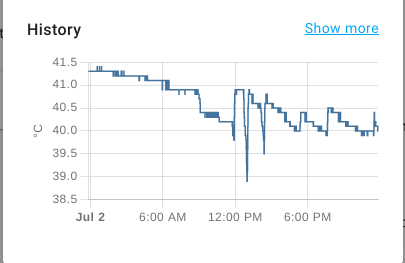
I need to be able to identify this top up consumption as a separate value in Home assistant. I'll have to think about that.
I bought some smart light bulbs today but I did not get them all operational. Once, done I'll work on the warning lights
Well I made a bit more progress with this. I defined the lights and built some basic automations to turn my warning light but I wasn't happy with it.
I decided to create an index variable (state) in Home Assistant that tracked the following states with a corresponding numeric value.:
- Using Grid Energy to top up the hot water system
- Importing (consuming) energy from the grid
- Diverting all solar energy to hot water system
- Diverting solar energy to hot water system, some surplus energy exporting to the grid
- Hot Water to temperature, all surplus energy being exported to the grid
This variable will be used to trigger our warning light automations (and no doubt other automations)
More updates when I have tested out our logic.
Here are a couple of posts I have made that link back to this page
https://community.home-assistant.io/t/australian-energy-integration/437167/5
https://community.home-assistant.io/t/looking-for-compatible-water-heater/436908/2
So appreciate your recommendation in the HA forum.
I think your work is good enough for attending this activity
https://www.iammeter.com/newsshow/activity-210618
My colleague will contact you to confirm the subsequent information.
Thanks again.
Thank you for that, I really appreciated the additional energy meter you sent me. I was also amazed how fast you fulfil orders for us Australians. It arrived in 2 to 3 days.
So today I thought I better install it beside my 3 phase meter. 😀
That's it on the right.

I decided to use it to monitor consumption on our air conditioners as they are on a separate circuit and are using a fair bit of energy for heating through our winter. I have it set up to send to our local iammeter docker instance which passes data on to the cloud. I'm not sure if everything is reporting correctly but I have not had time to look hard at how it works. I set the new circuit up as a load and I think it is being added to the calculated house load so i am sure a few questions will follow. I think I need to allow for this in Home Assistant.
A few other goodies arrived yesterday. Some of this might seem to be a bit off topic but if I had not bought an Iammeter I would never have discovered what devices exist to monitor and control energy usage.he things
But one of the things that is in scope is the Broadlink RM4 Pro universal remote show here on a bench directly below the air conditioner I want it to control based on Iammeter data.
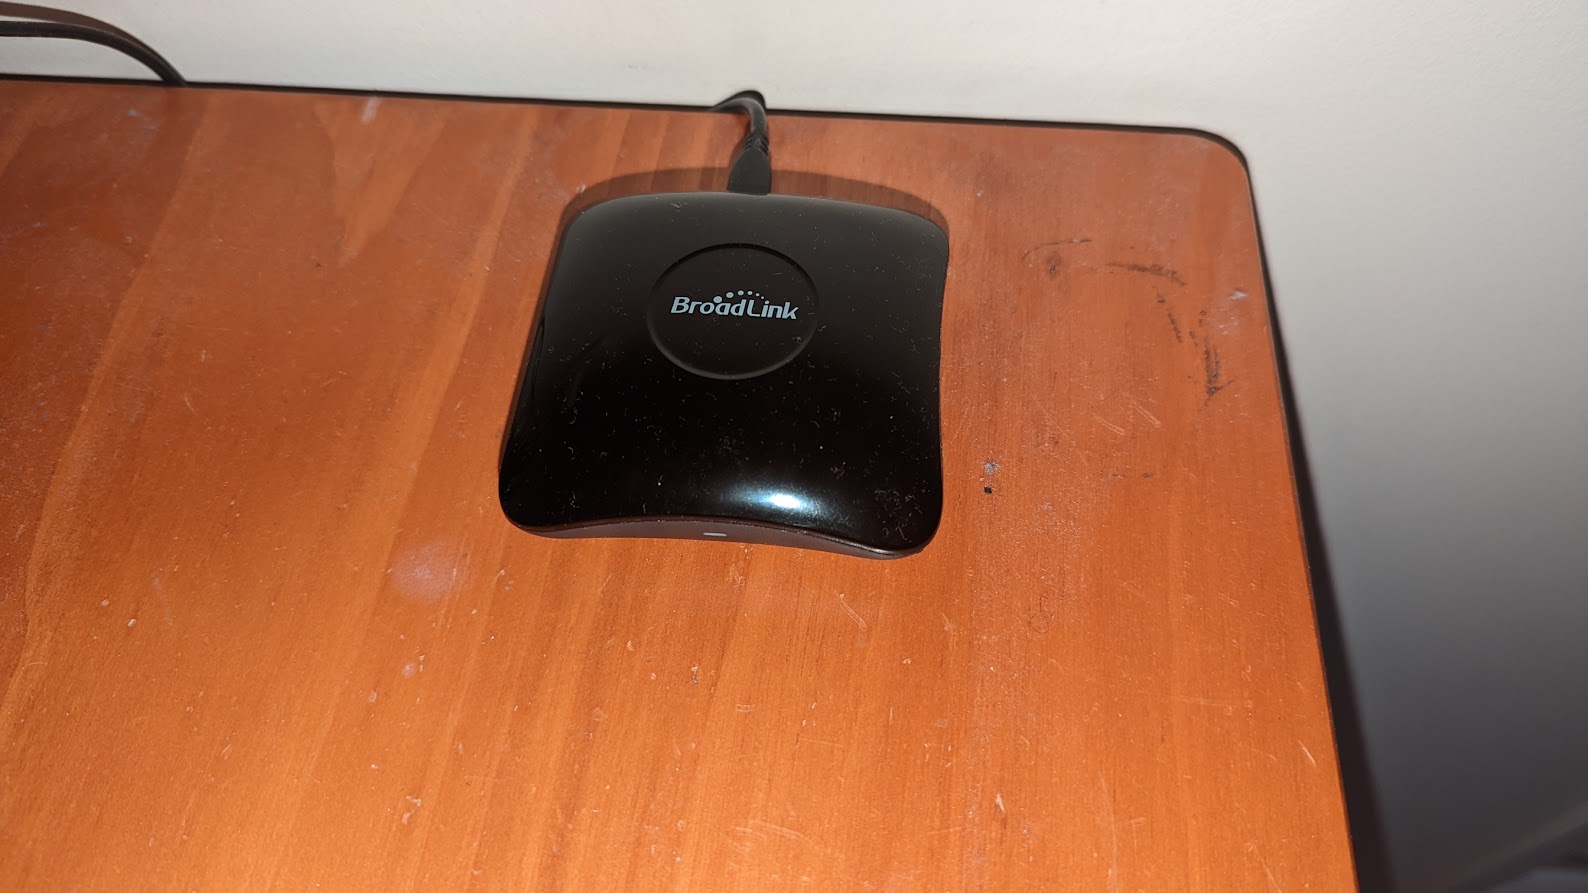
I have been able to configure it to turn the air conditioner on and off from within the broadlink app. I just need to integrate it into Home Assistant.
The other interesting device is a a Shelly Button which is only about 30mm wide.
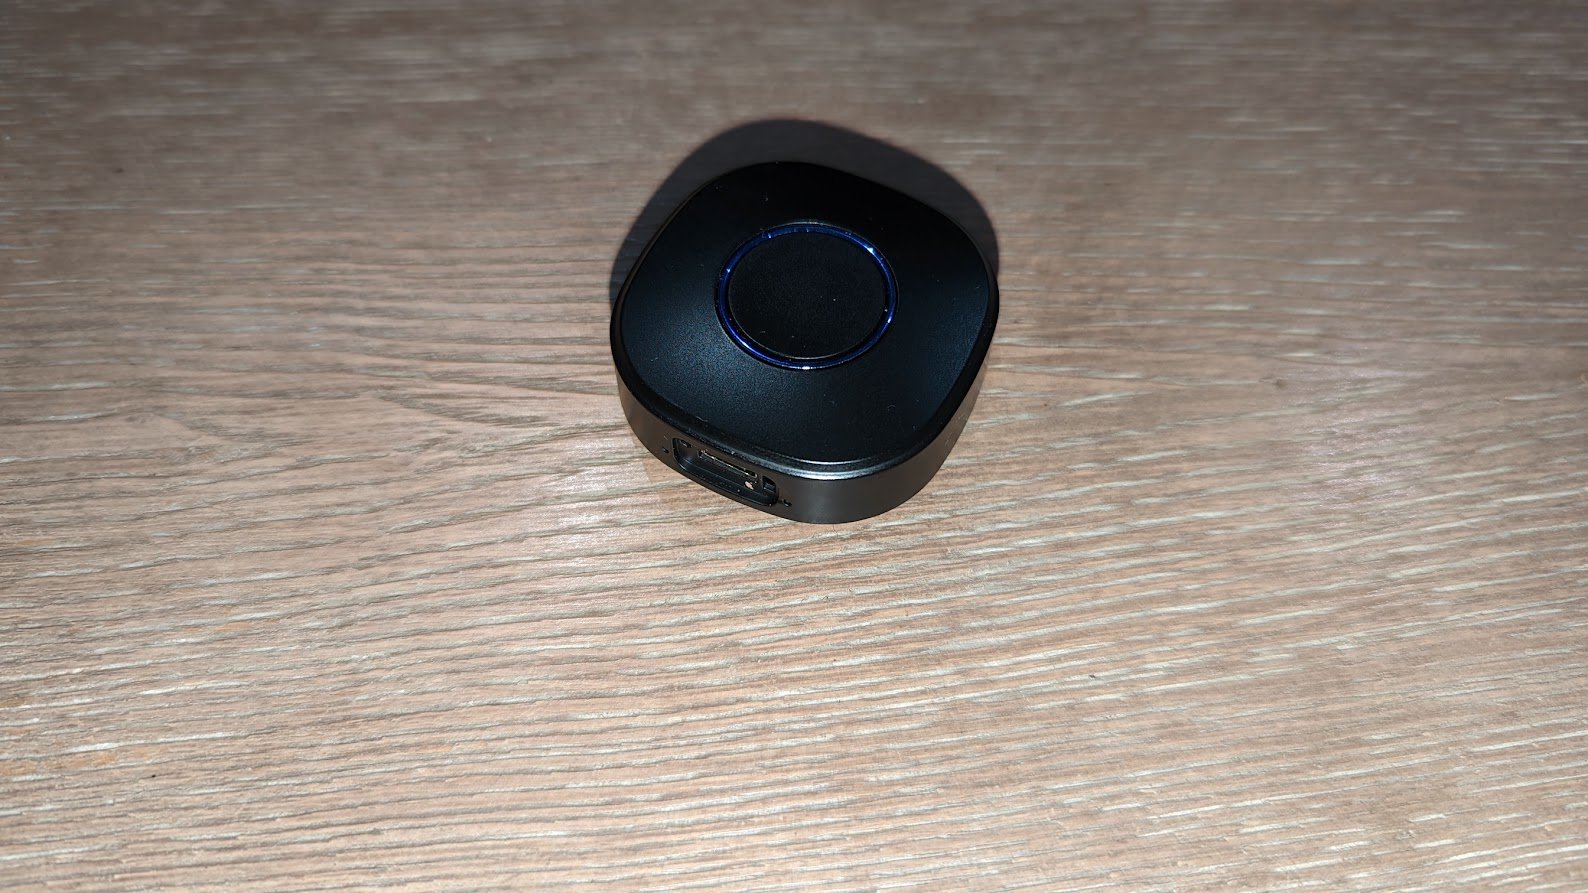
The button supports 4 different commands. ( short press, long press 2 clicks, 3 clicks). The main idea I had here was to press a button when we go to bed that turns everything off. I can see now we could use more than one!
The other thing I installed today was a Shelly PM 1 Pro on the light switch in the garage. This light really annoys me sometimes as it's on when not required.
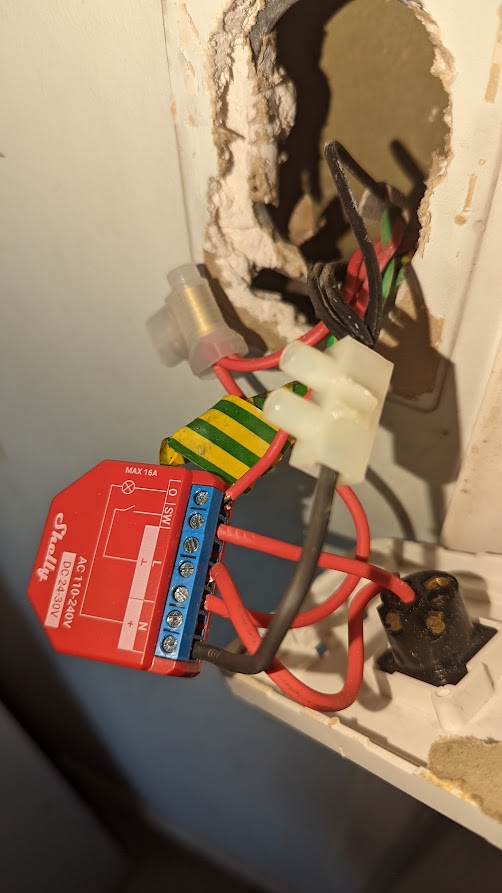
It took me a while to work it out as there are a lot of wires on the average light switch but basically, you need to identify the active wire going the light and attach it to the O terminal, then move the neutral and active wires from the switch to the Shelly. The Shelly terminals are pretty small so using some joiners and a couple of short pieces of wire seems to be the way to go. All that remains then is to connect the switch terminals to the Shelly as per the supplied diagram.
Set the Shelly up in edge mode so flicking the switch toggles the light on and off.
I had some problems getting Home Assistant to see the Shelly PM as its fairly new but upgrading to the latest version of Home Assistant (released today) solved the issue. I added this device to my Shelly button automation so we could turn the device off as we go to be if its still on.
The next steps are to:
1. Ahe dd a Shelly motion sensor in the garage to turn the light on and off when motion is sensed.
2. Get the Broadlink remote under Home Assistant control
3. Build an automation to turn the aircon on with the Broadlink when sufficient surplus energy is available!
So stay tuned!
We found it is an excellent idea to use the Home Assistant to implement the local control loop and use the IAMMETER cloud to review the final effect of the control loop.
Especially after the Wi-Fi energy meter supports the Modbus/TCP, the Modbus sensor in Home Assistant supports the sample rate up to 1 s/s (sample/second).
Sample the energy data reading in 1s/s and use this as the sensor value in the control loop to feedback the control loop, it can be used to implement many interesting ideas.
Like this https://imeter.club/topic/272